"How to Apply a Matte Metallic Vinyl Wrap: A Step-by-Step Guide"
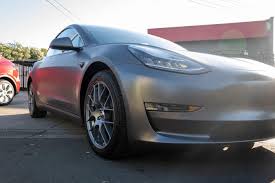
Matte Metallic Vinyl Wrap are an excellent way to upgrade the look of your vehicle, providing a sleek and modern finish while protecting the original paint. Applying a vinyl wrap can seem daunting, but with the right tools and steps, you can achieve professional results. Here's a detailed guide to help you through the process.
Step 1: Gather the Necessary Tools
Before starting, ensure you have all the required materials. You'll need a roll of matte metallic vinyl wrap, a heat gun, a squeegee, a utility knife, isopropyl alcohol, microfiber cloths, and gloves. Having these tools ready will keep the process smooth and efficient.
Step 2: Prepare the Vehicle Surface
Proper preparation is key to a flawless application. Wash your vehicle thoroughly to remove dirt, grease, and debris. Once clean, wipe the surface with isopropyl alcohol to eliminate any remaining contaminants. Ensure the car is completely dry before proceeding. This step ensures the vinyl adheres properly without bubbles or imperfections.
Step 3: Measure and Cut the Vinyl
Measure each section of your vehicle that you plan to wrap. Add a few extra inches to your measurements to account for trimming and adjustments. Lay the vinyl on a clean, flat surface and cut it according to your measurements. Be cautious—precision at this stage will save you time later.
Step 4: Position the Vinyl
Peel off a portion of the backing paper from the vinyl and position it on the vehicle. Start with a smaller section, such as a door or hood, to get accustomed to the process. Align the vinyl carefully, ensuring it covers the area completely.
Step 5: Apply and Smooth the Vinyl
Using your squeegee, gently press the vinyl onto the surface, starting from the center and working outward. This technique helps push out air bubbles and ensures even adhesion. Take your time to avoid creases or wrinkles. For curved areas, use a heat gun to soften the vinyl, making it more pliable and easier to mold.
Step 6: Trim Excess Vinyl
Once the vinyl is securely applied, use a utility knife to trim away any excess material. Be precise and careful not to cut into the paintwork. Tuck in the edges neatly for a clean and professional finish.
Step 7: Final Inspection and Heat Treatment
Inspect the wrapped surface for any remaining bubbles or imperfections. Use the heat gun to go over the entire area again, ensuring the vinyl adheres fully and conforms to the vehicle's contours. This step also helps activate the adhesive for long-lasting results.(Bronze Vinyl Wraps)
Step 8: Repeat for Other Sections
Repeat the process for each section of your vehicle until it is fully wrapped. Take breaks as needed to maintain focus and precision.
Conclusion
Applying a matte metallic vinyl wrap requires patience and attention to detail, but the results are worth it. By following these steps, you can transform your vehicle's appearance while protecting its original finish. Whether you're doing it yourself or working with a team, this guide will help you achieve a stunning, professional-grade wrap.